 Admin
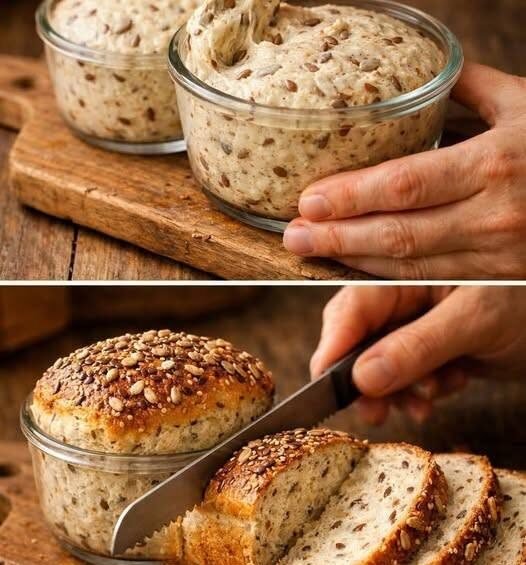
No-Knead Bread in a Jar 🍞
Make beautiful, rustic homemade bread with minimal effort! This easy no-knead bread recipe uses simple pantry ingredients, requires no intensive kneading, and develops a deliciously chewy texture with a golden, crispy crust. The dough is mixed, allowed to rise, and stored in a jar or container before baking.
Perfect for beginners, homemade bread lovers, and anyone who wants fresh bakery-style bread without complicated techniques.
Prep Time: 10–15 minutes Rising Time: 2–3 hours Chilling Time: Optional, overnight Baking Time: 35–45 minutes Servings: 1 medium loaf
Ingredients
-
3 cups (375g) all-purpose flour or bread flour
-
1½ cups (360ml) lukewarm water
-
1 tsp instant yeast
-
1½ tsp salt
-
1 tsp honey or sugar (optional)
-
1 tbsp olive oil (optional)
Equipment Needed
-
Large mixing bowl
-
Clean wide-mouth glass jar or food-safe container
-
Wooden spoon or spatula
-
Parchment paper
-
Dutch oven or heavy oven-safe baking pot
Step-by-Step Instructions
Step 1: Mix the ingredients
In a large mixing bowl, combine flour, instant yeast, and salt.
Add lukewarm water and honey. Stir with a wooden spoon until everything is combined.
The dough will look sticky, rough, and shaggy. This is completely normal. There is no need to knead it!
Step 2: Transfer the dough to a jar
Lightly grease a large, clean, food-safe glass jar or container.
Transfer the dough into the jar using a spatula.
Choose a container that leaves plenty of room for expansion, ideally at least three times the dough’s initial volume.
Important: Never seal the jar tightly while the dough is fermenting. Cover it loosely with a lid or breathable cover so gases can escape. Do not bake in an ordinary glass storage jar.
Step 3: Let the dough rise
Place the covered jar in a warm, draft-free area.
Allow the dough to rise for approximately 2–3 hours, or until it has noticeably doubled in size and looks bubbly.
For a deeper flavor, refrigerate the dough overnight after its initial rise.
Step 4: Shape the bread
Lightly flour your work surface.
Gently transfer the dough onto the surface. Fold the edges toward the center to create a round loaf.
Turn it seam-side down and shape it gently.
Place the dough on parchment paper and let it rest for another 30–45 minutes.
Step 5: Preheat the oven
Preheat your oven to 230°C (450°F).
Place a Dutch oven or heavy oven-safe baking pot with its lid inside the oven while it preheats.
Allow the pot to become thoroughly hot before baking.
Step 6: Bake the bread
Carefully remove the hot pot from the oven.
Lift the dough using the parchment paper and place it inside the pot.
Using a sharp bread knife or lame, make a shallow cut across the top of the dough.
Cover with the lid and bake for 30 minutes.
Remove the lid and bake for another 10–15 minutes until the crust becomes deep golden brown and crispy.
Step 7: Cool and serve
Remove the bread from the pot and transfer it to a wire cooling rack.
Allow it to cool for at least 45–60 minutes before slicing.
This helps the inside finish setting and prevents a gummy texture.
Approximate Nutrition Information
150–170 kcal
Per slice (assuming 12 slices per loaf)
4–5g
30–34g
0.5–1.5g
1–2g
Approximate values; depend on flour type and optional ingredients.
Tips for Perfect No-Knead Bread
-
Don’t add too much flour: Sticky dough creates a moist, airy crumb.
-
Use lukewarm water: Very hot water can damage the yeast.
-
Allow enough rising time: Fermentation develops flavor and texture.
-
Avoid tightly sealing the jar: Rising dough releases gas and needs room to expand.
-
Use a hot baking pot: It helps create a beautifully crisp crust.
-
Don’t cut too early: Let the bread cool completely before slicing.
-
Try overnight fermentation: Refrigerating the dough can develop a richer, more complex flavor.
Delicious Ways to Enjoy It
-
Spread with butter and homemade strawberry jam.
-
Serve with creamy soups and stews.
-
Make avocado toast with eggs.
-
Use for sandwiches and grilled cheese.
-
Dip into olive oil, garlic butter, or hummus.
-
Toast and serve with honey for breakfast.
Storage Instructions
-
Room temperature: Store in a paper bag or bread box for 2–3 days.
-
Refrigeration: Generally not recommended because bread can become stale faster.
-
Freezing: Slice and freeze in an airtight freezer bag for up to 3 months.
-
Reheating: Toast slices directly from frozen or warm the loaf in the oven.
A little baking inspiration ❤️
The magic of no-knead bread is that time does most of the work for you. Just mix, let the dough rise, shape, and bake. You’ll have a beautiful homemade loaf with a crispy golden crust and a soft, chewy center!
Baking tip: If you’re making this recipe specifically for storing dough in a jar, use a wide-mouth food-safe container rather than a narrow decorative jar. Always bake the shaped dough separately in an oven-safe baking pot.


